
| 일 | 월 | 화 | 수 | 목 | 금 | 토 |
|---|---|---|---|---|---|---|
| 1 | ||||||
| 2 | 3 | 4 | 5 | 6 | 7 | 8 |
| 9 | 10 | 11 | 12 | 13 | 14 | 15 |
| 16 | 17 | 18 | 19 | 20 | 21 | 22 |
| 23 | 24 | 25 | 26 | 27 | 28 |
- 모션그래픽 #애프터이펙트 #repeater #shapelayer #L편집
- vollyball #kimyeonkoung #korea #sports #star #poster
- 색보정 #Image #adjustments #levels #Vibrance #Saturation #Hue #ReplaceColor #ColorLookup #3DLUT #invert #posterize #threshold #GradientMap #Desaturate #Filter #CameraRawFilter #layer #link #merge #flatten #blending #stroke #DropShadow #Mask #ClippingMa
- 블렌딩모드 #Darken #lighten #Overlay #Difference #Hue
- 포토샵 #언어바꾸기 #영문판 #한글판 #쉬운방법
- Unity #C샵 #레이싱게임
- 애니메이션 제거
- 엘리스 #엘리스코딩 #인공지능 #데이터분석 #코딩 #온라인강의 #파이썬 #AI #한국표준협회 #인공지능전문가 #자격증
- 모션 #타이틀영상 #글자 #자막 #Animation #포토샵 #프리미어 #인터폴레이션 #키프레임 #EffectsControls #Motion #position #scale #rotation #sequence #opacity #Ease #In #Out #Bezier #text #opening #title #Subtitle
- Java #안드로이드스튜디오 #datepicker #timepicker
- Channels #채널 #RGB #RefineEdge #머리카락누끼 #지우개 #MagicEraser #SpotHealing #Brush #Blur #Patch #Sharpen #Smudge #Dodge #Burn #Sponge #잡티제거 #펜툴 #shape #custom #흐르는문자 #가변글씨 #Acumin #Rasterize #FrameText #텍스
- 프리미어 #모션 #스포츠 #포스터 #김연경 #배구 #여제 #
- 포토샵 #실습 #학생 #창작
- Unity #C샵 #슈팅 #게임
- 엘리스코딩 #인공지능 #데이터분석 #파이썬 #코딩 #온라인강의 #NIPA #정보통신산업진흥원 #AI
- 포토샵 #Photoshop
- 프리미어 #영상편집 #기초 #편집하는법 #shot #샷의다양성 #샷 #크기 #Take #shot #scene #sequence #영상제작과정 #포맷 #코덱 #인코더 #디코더 #FrameRate #Frame #프레임 #픽셀 Pixel #시퀀스설정 #포맷변환 #Seque
- 프리미어 #영상편집 #기초 #import #editing #export #interface #주요패널 #pannel #project #source #program #timeline #encoding #H264 #MP4 #Queue #label #in #out #marker #편집점 #편집하는법
- 포토샵 #필터 #Filter #FilterGallery #왜곡 #LensCorrection #표정 #Liquify #회화 #Stylize #FindEdges #Noise #GradientMap #Monochromatic #AdjustmentLlayer #폰트 #OTF #외부브러시 #ImportBrush #Brusheezy
- 무료결제API
- 인디자인 #이펍 #시길 #epub #sigil #전자책 #이북 #ebook #출판 #팝업주석
- bottom Navigation
- 포토샵 #스포츠 #포스터 #실습 #학생 #창작 #레이아웃 #구도 #배구 #김연경 #vollyball #kimyeonkoung #korea #sports #star #poster
- AI #python #코인 #회귀 #RNN
- photoshop #UI #language
- opening #title
- Java #그림판 #이벤트리스너
- 모션그래픽 #타이포그래픽 #북트레일러 #마당을나온암탉
- 무드보드 #behance #pinterest #Image #Canvas #Scale #Lasso #누끼따기 #Color #Pattern #Fill #ContentAware
- 인포그래픽 #체벌 #올바른훈육법 #훈육 #아동학대 #체벌 #부모교육 #아동 #체벌반대
MyWorld
[Android : Java] RecyclerView 만들기 본문
리사이클러뷰 만드는 방법을 소개해보려 한다.
다음은 내 프로젝트에서 사용한 예제이다. 참고로 보면 될 거다.
1. 리사이클러뷰 안의 item.xml 을 먼저 만든다.
item_product.xml
<?xml version="1.0" encoding="utf-8"?>
<androidx.constraintlayout.widget.ConstraintLayout xmlns:android="http://schemas.android.com/apk/res/android"
    xmlns:app="http://schemas.android.com/apk/res-auto"
    xmlns:tools="http://schemas.android.com/tools"
    android:layout_width="match_parent"
    android:layout_height="wrap_content"
    android:elevation="8dp"
    android:paddingBottom="32dp"
    android:layout_marginHorizontal="10dp">

    <ImageView
        android:id="@+id/iv_product"
        android:layout_width="match_parent"
        android:layout_height="0dp"
        app:layout_constraintDimensionRatio="1:1"
        app:layout_constraintLeft_toLeftOf="parent"
        app:layout_constraintRight_toRightOf="parent"
        app:layout_constraintTop_toTopOf="parent"
        tools:background="@drawable/round"
        tools:src="@drawable/ecobag" />


    <ImageView
        android:id="@+id/iv_favorite"
        android:layout_width="34dp"
        android:layout_height="32dp"
        android:layout_margin="4dp"
        android:layout_marginStart="320dp"
        android:layout_marginTop="16dp"
        android:background="?android:attr/selectableItemBackgroundBorderless"
        android:src="@drawable/ic_baseline_favorite_border_24"
        app:layout_constraintRight_toRightOf="parent"
        app:layout_constraintTop_toTopOf="parent" />

    <TextView
        android:layout_marginLeft="0dp"
        android:id="@+id/tv_name"
        style="@style/nanumExtraBoldTextViewStyle"
        android:layout_width="wrap_content"
        android:layout_height="wrap_content"
        app:layout_constraintLeft_toLeftOf="parent"
        app:layout_constraintTop_toBottomOf="@+id/iv_product"
        tools:text="에코백"
        android:textSize="14dp"
        android:maxLines="1"
        android:ellipsize="end"
        android:layout_marginTop="8dp"
        android:textColor="#323232" />

    <TextView
        android:layout_marginLeft="0dp"
        android:id="@+id/tv_price"
        android:layout_width="wrap_content"
        android:layout_height="wrap_content"
        app:layout_constraintLeft_toLeftOf="parent"
        app:layout_constraintTop_toBottomOf="@+id/tv_name"
        tools:text="2,0000원"
        style="@style/nanumExtraBoldTextViewStyle"
        android:textSize="11dp"
        android:layout_marginTop="5dp"
        android:textColor="@color/red"
        android:layout_marginBottom="9dp"/>

</androidx.constraintlayout.widget.ConstraintLayout>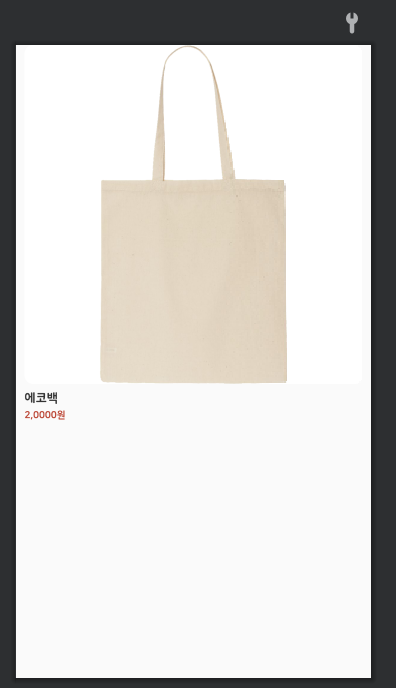
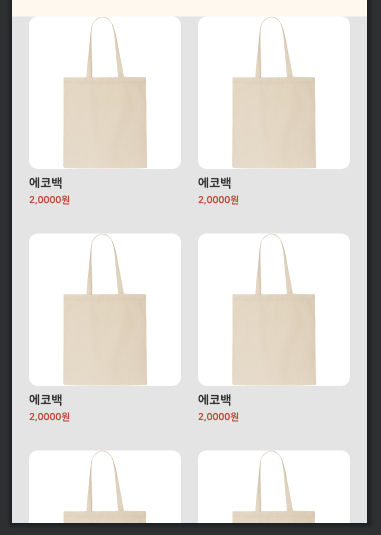
2. 위의 item을 리사이클러뷰에 달아준다.
<androidx.recyclerview.widget.RecyclerView
        android:paddingHorizontal="10dp"
        android:clipToPadding="true"
        tools:background="#000000"
        android:layout_width="match_parent"
        android:layout_height="match_parent"
        android:id="@+id/rv_product"
        tools:listitem="@layout/item_product"
        app:layoutManager="androidx.recyclerview.widget.GridLayoutManager"
        app:spanCount="2"/>
layoutManager를 Grid로 정하고 spanCount를 2로 정해서 2줄로 보이게 만들었다.
레이아웃 디자인이 완료되었다면 이제 코드를 작성해야 한다.
리사이클러뷰를 사용하기 위해선 Adapter가 필요하다.
3. Adapter를 만들어준다.
어댑터를 만들기 위해 Java class를 만들어 준다.
extends 부분을 직접 작성하면 빨간 에러가 뜰 텐데 옵션키와 엔터키를 눌러 에러를 차근차근 고치면 어댑터의 틀이 자동으로 완성된다.
(1) 아이템 뷰 연결
onCreateViewHolder에서 바인딩으로 1번에서 작성한 item.xml 을 연결해주었다.
return new ViewHolder(binding)을 작성 후 binding에서 빨간색 오류가 뜨는 것을 옵션 엔터로 고쳐준다.
ViewHolder 내부 클래스에서도 바인딩 1, 바인딩 2로 주석 처리한 부분을 작성해주어야 뷰 연결이 끝난다.
(2) 어댑터를 호출하는 액티비티나 프래그먼트의 데이터를 받아오기 위해 필요한 파라미터를 가지는 생성자를 만든다.
나는 ProductData의 데이터들을 ArrayList로 받아왔다. 뷰를 클릭 시 원하는 대로 동작하게 해주는 interface의 listener도 넘겨받아오도록 만들었다.
- 인터페이스 정의 필요 : 여기선 아이템 누를 때와 찜 누르는 걸로 만들었다
(3) getItemCount()는 받아온 데이터 크기와 같아서 return datas.size()로 작성했다.
(4) onBindViewHolder에서 holder.bind(holder, datas.get(position)) 을 만들어주면 bind에 빨간 에러가 뜨는데 옵션 엔터로 ViewHolder 내부 클래스 안에 bind 메소드를 생성하면 된다.
bind안에서는 가져온 ProductData의 정보를 차례로 item.xml의 위젯에 연결해준다. 코드로 뷰에 정보를 넣는 부분인 것이다. 이런 식으로 같은 아이템 틀 안에 서로 다른 정보를 여러 개 넣어서 리사이클러뷰를 만들 수 있게 된다.
어댑터 부분 설명은 끝났다.
다음으로 recylerview위젯을 갖는 액티비티나 프래그먼트에서 어떻게 어댑터와 연결되는지 설명하겠다.
ProductlistAdpater.java
public class ProductlistAdpater extends RecyclerView.Adapter<ProductlistAdpater.ViewHolder> { //어댑터

    Context mContext;
    ArrayList<ProductData> datas;
    ProductInterface listener;

    //인터페이스
    public interface ProductInterface{
        void onItemClick(ProductData data);
        void onFavoriteClick(ProductData data, int position);
    }

	//사용할 생성자
    public ProductlistAdpater(Context mContext, ArrayList<ProductData> datas, ProductInterface listener) {
        this.mContext = mContext;
        this.datas = datas;
        this.listener = listener;
    }

    @NonNull
    @Override
    public ViewHolder onCreateViewHolder(@NonNull ViewGroup parent, int viewType) { //어댑터에서 바인딩 쓰는 법
        ItemProductBinding binding = ItemProductBinding.inflate(LayoutInflater.from(parent.getContext()), parent, false);
        return new ViewHolder(binding);
    }

    @Override
    public void onBindViewHolder(@NonNull ViewHolder holder, int position) {
        holder.bind(holder ,datas.get(position));
    }

    @Override
    public int getItemCount() {
        return datas.size();
    }

    public class ViewHolder extends RecyclerView.ViewHolder {

        ItemProductBinding binding; //바인딩1

        public ViewHolder(ItemProductBinding binding) {
            super(binding.getRoot());
            this.binding = binding; //바인딩2
        }

        public void bind(ViewHolder holder, final ProductData productData) {

            try{
                Glide.with(holder.itemView.getContext())
                        .load(productData.getUrls().get(0))
                        .error(R.mipmap.ic_launcher)
                        .thumbnail(Glide.with(holder.itemView.getContext()).load(R.drawable.loading_products)) //로딩 이미지에 gif 넣는 법
                        .apply(RequestOptions.bitmapTransform(new RoundedCorners(20))) //라운드를 줄 수 있다
                        .into(binding.ivProduct);
            }catch (Exception e){
                Glide.with(holder.itemView.getContext())
                        .load(R.drawable.swuri_2)
                        .error(R.mipmap.ic_launcher)
                        .placeholder(R.drawable.loading_example)//
                        .apply(RequestOptions.bitmapTransform(new RoundedCorners(20)))
                        .into(binding.ivProduct);
            }

            binding.tvName.setText(productData.getName());
            binding.tvPrice.setText(
                    new DecimalFormat("###,###,###,###")
                            .format(productData.getPrice()) + "원"
            );

            //리사이 클러뷰의 찜
            if (productData.isInWishlist()){
                 binding.ivFavorite.setImageResource(R.drawable.ic_baseline_favorite_24);
            }else{
                binding.ivFavorite.setImageResource(R.drawable.ic_baseline_favorite_border_24);
            }

            //리사이클러뷰의 찜 버튼을 클릭할 때
            binding.ivFavorite.setOnClickListener(v -> {
                listener.onFavoriteClick(productData, getAdapterPosition());
            });

            //리사이클러뷰의 아이템 뷰들을 각각 클릭할 때 나오는 창
            itemView.setOnClickListener(new View.OnClickListener() {
                @Override
                public void onClick(View v) {
                    listener.onItemClick(productData);
                }
            });

        }
    }
}
4. 리사이클러뷰와 어댑터 연결
리사이클러뷰를 사용할 액티비티나 프래그먼트에서 setRv() 메소드를 만들어준다.
리사이클러뷰의 id로 setRvLayoutManager로 레이아웃을 정해주고
setAdapter로 3번의 어댑터를 연결해준다. 생성자로 인터페이스도 받아가서
리스너에 인터페이스를 구현해서 넘겨주어야 한다.
 	private void setRv() { //받아온 걸로 리사이클러뷰 셋

        // 찜과 아이템 클릭을 처리하기 위해 인터페이스를 구현
        ProductlistAdpater.ProductInterface listener = new ProductlistAdpater.ProductInterface() {
            @Override
            public void onItemClick(ProductData data) {
                itemClick(data);
            }

            @Override
            public void onFavoriteClick(ProductData data, int position) {
                favoriteClick(data, position);
            }
        };

        binding.rvProduct.setLayoutManager(new GridLayoutManager(getContext(), 2));
        binding.rvProduct.setAdapter(new ProductlistAdpater(getContext(), datas, listener));
    }

    private void favoriteClick(ProductData data, int position) {
    	//찜 눌릴 때 DB 업데이트
    }

    private void itemClick(ProductData data) {
        //상품 상세로 이동 activity
		...
    }
이제 리사이클러뷰를 만들기 위한 작업이 모두 끝났다.
꽤 복잡해서 여러 번 연습해야 한다. 자바 코드보다 코틀린이 더 간단하다고 하니 이제 막 안드로이드 개발을 시작했다면 코틀린으로 배우는 걸 추천한다.
'Android 앱 개발 (Java)' 카테고리의 다른 글
| [Android : Java] Naver Map 도로명주소 찾는 기능 사용 (0) | 2021.06.03 |
|---|---|
| [Android : Java] RecyclerView에서 picasso 사용 시 새로 로딩되는 문제 해결 (0) | 2021.06.03 |
| [Android : Java] Glide의 placeholder에 gif 넣는 법 (0) | 2021.06.03 |
| [Android : Java] bottom navigation 애니메이션 제거 (0) | 2021.06.03 |
| [Android : Java] PG결제 시스템 부트페이API (0) | 2021.06.03 |

